Here is another kit DIY project. This time it is a fretless bass with 5 strings I made for our band bass player.
KIT
The kit itself was bought from kitbuiltguitars.co.uk
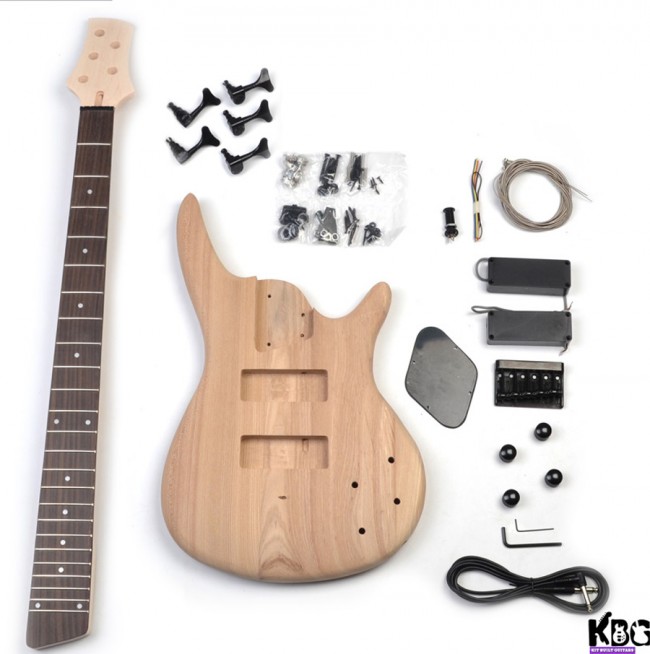
This resource has only a few bass kits available. But price tags are quite fair and all bass kits available with fretless necks. Here is a picture from the seller.
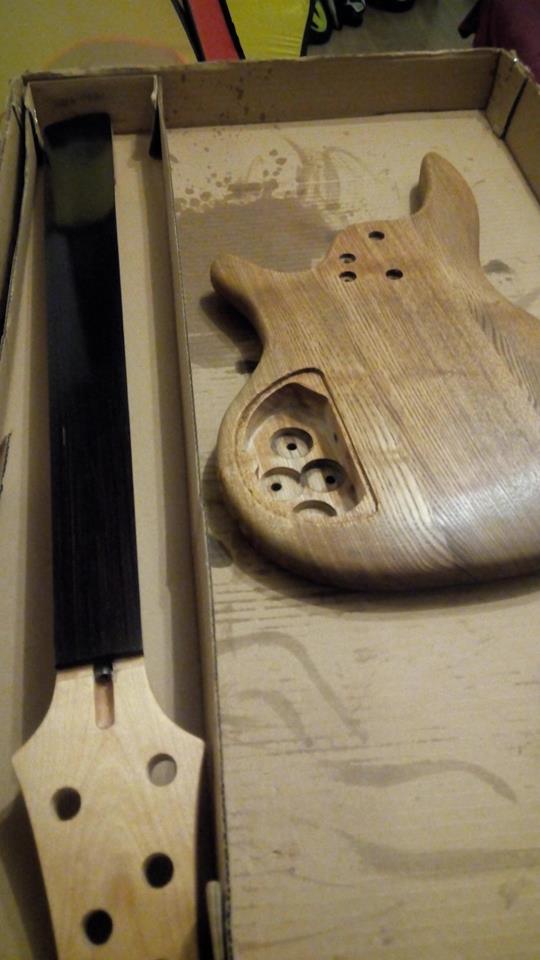
Packaging
Kit arrived quit purely packed. Small cardboard with body and neck wrapped in bubble wrapping. Fortunately, the kit arrived in almost perfect shape with few very small dings.
Wood and Hardware
As this kit don’t have a bunch of standards parts as Fender style kits, I have decided to stay with original parts. Hardware quality was quite good. Tuners are acceptable, the bridge has a thick metal string holder part. The only part that I have replaced was neck nut. One which came with the kit was made from soft plastic. For the replacement, we ordered one from Harley-Benton at Thomann (Harley Benton Parts Bone Nut Blank 45). This nut fits perfectly to the nut place. The new nut was made from a much harder material and definitely will improve tone, tuning stability, and playability of the instrument.

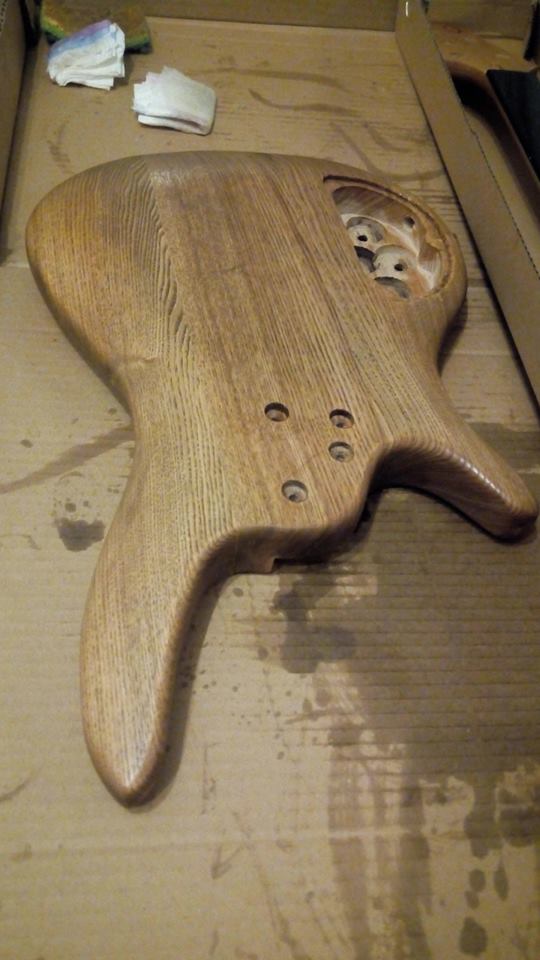
The neck itself made out from 2 pieces of maple. It is usually made this way on bent headstock necks.
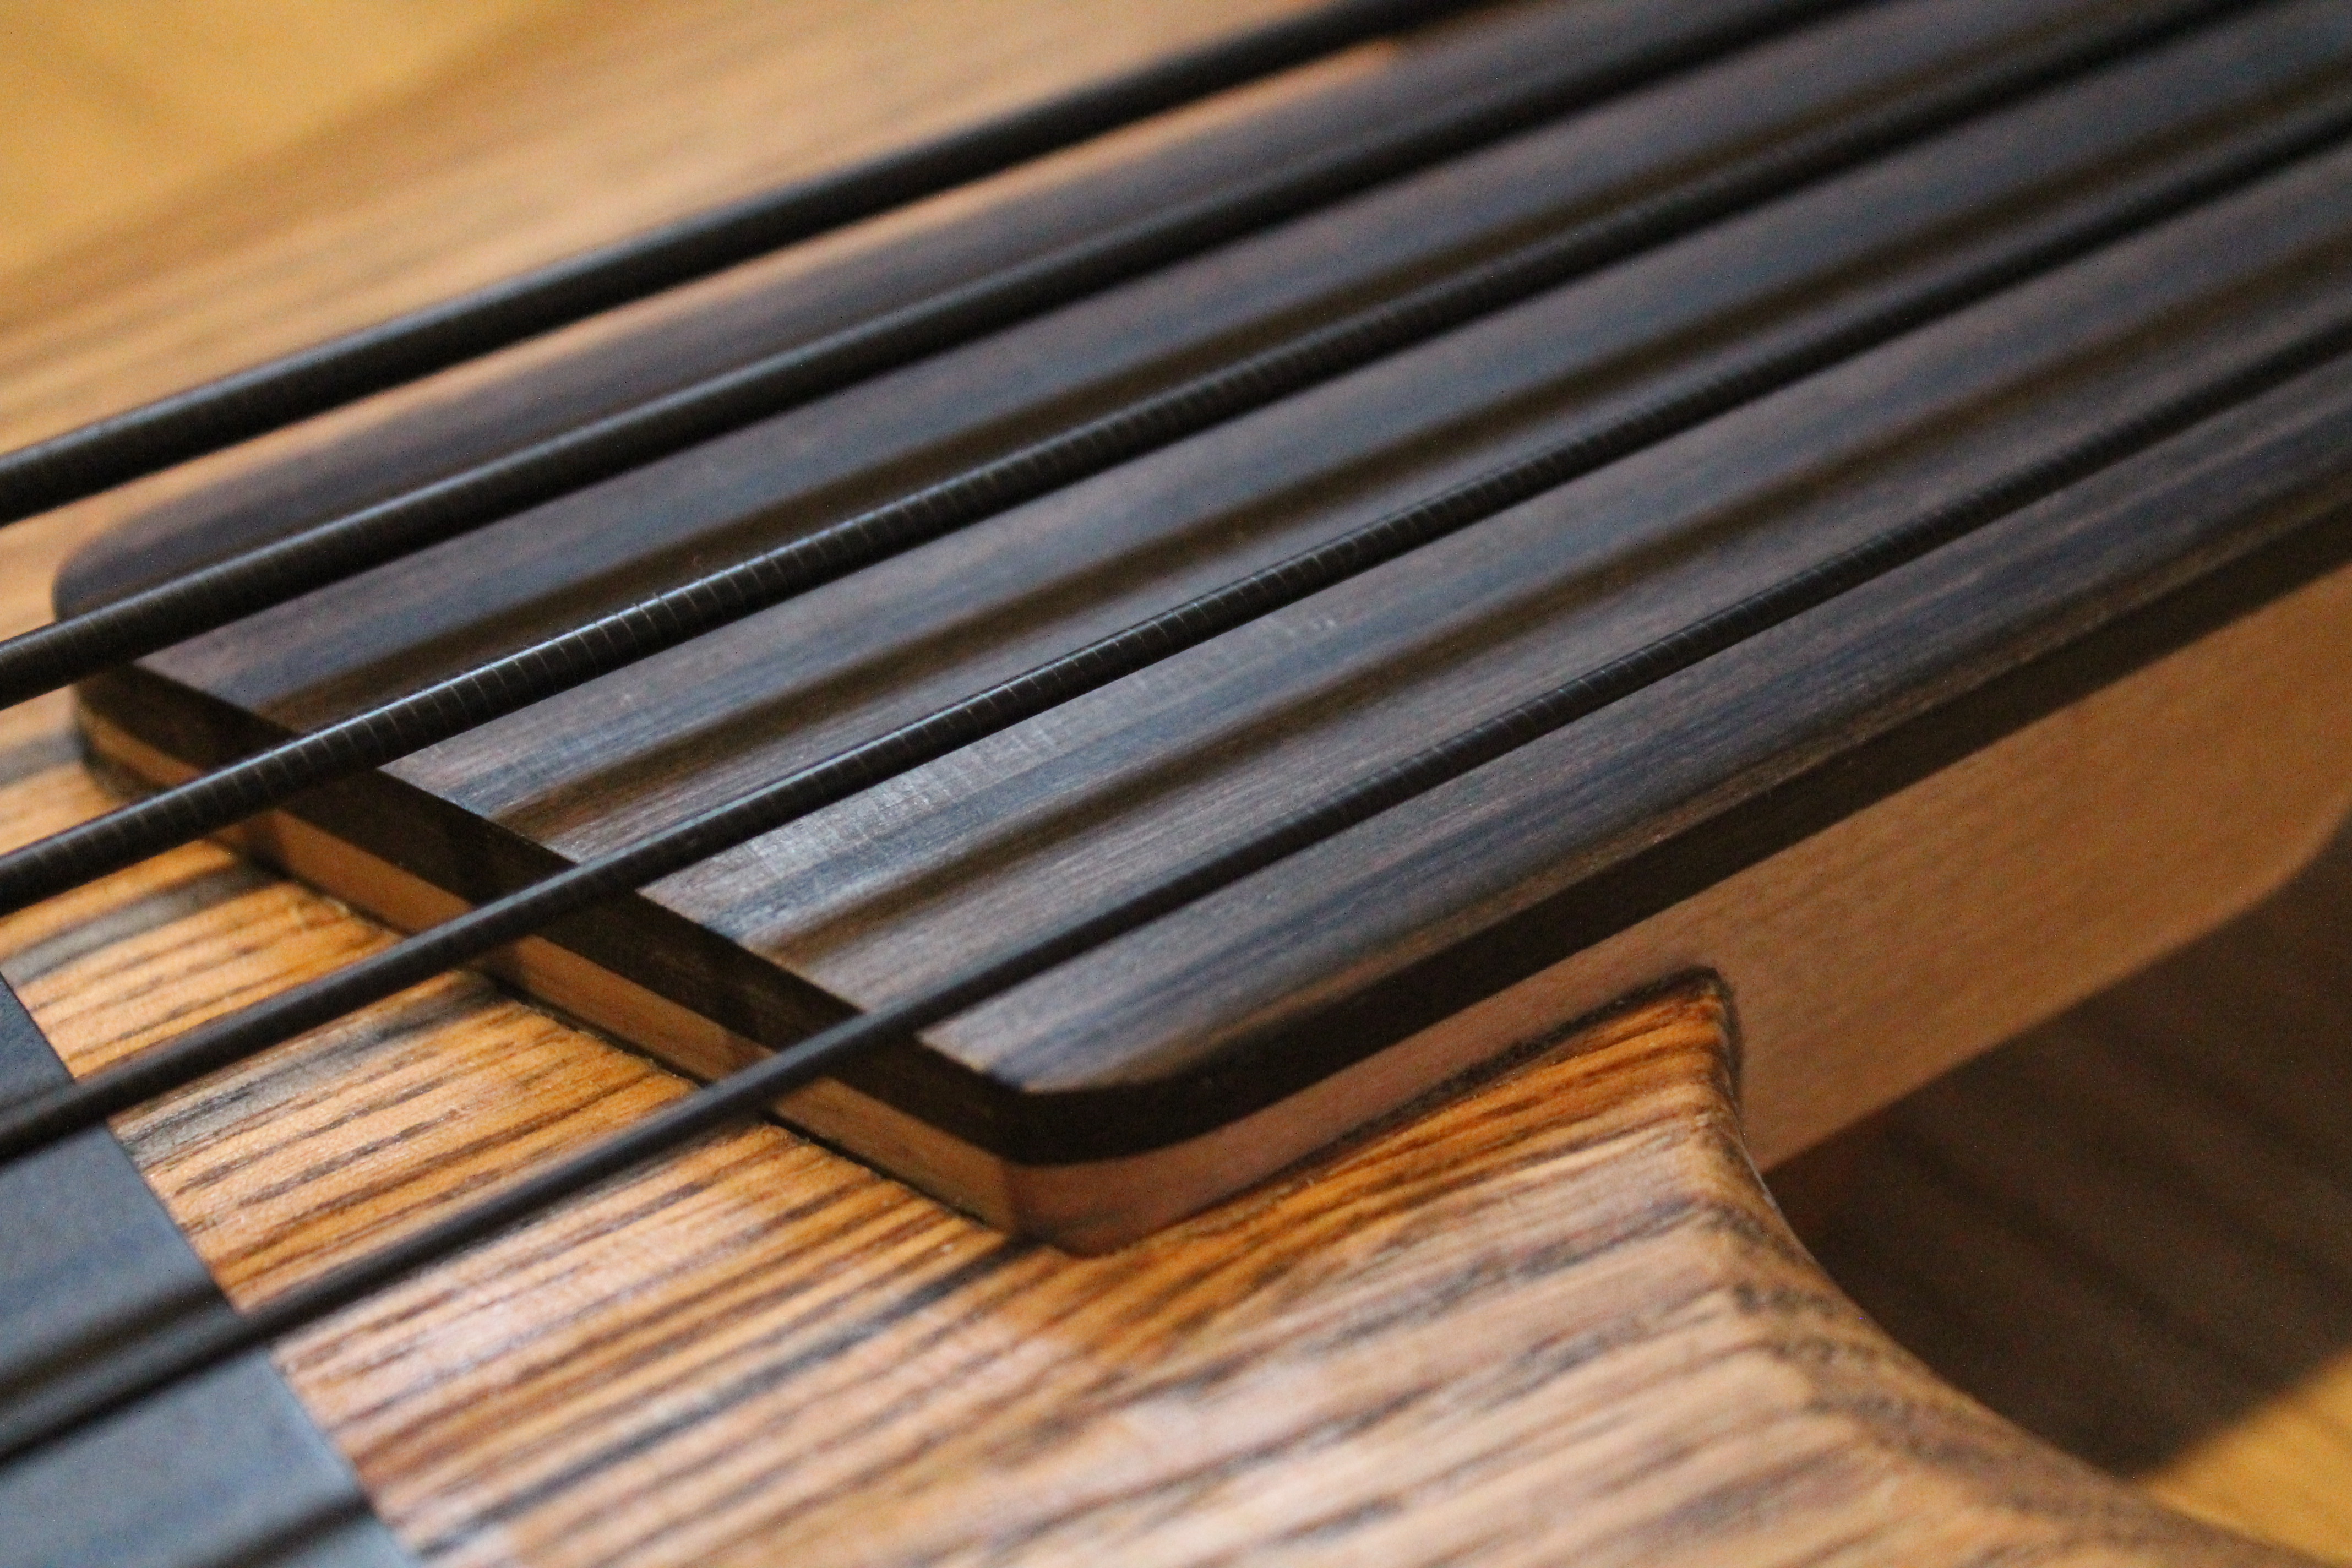
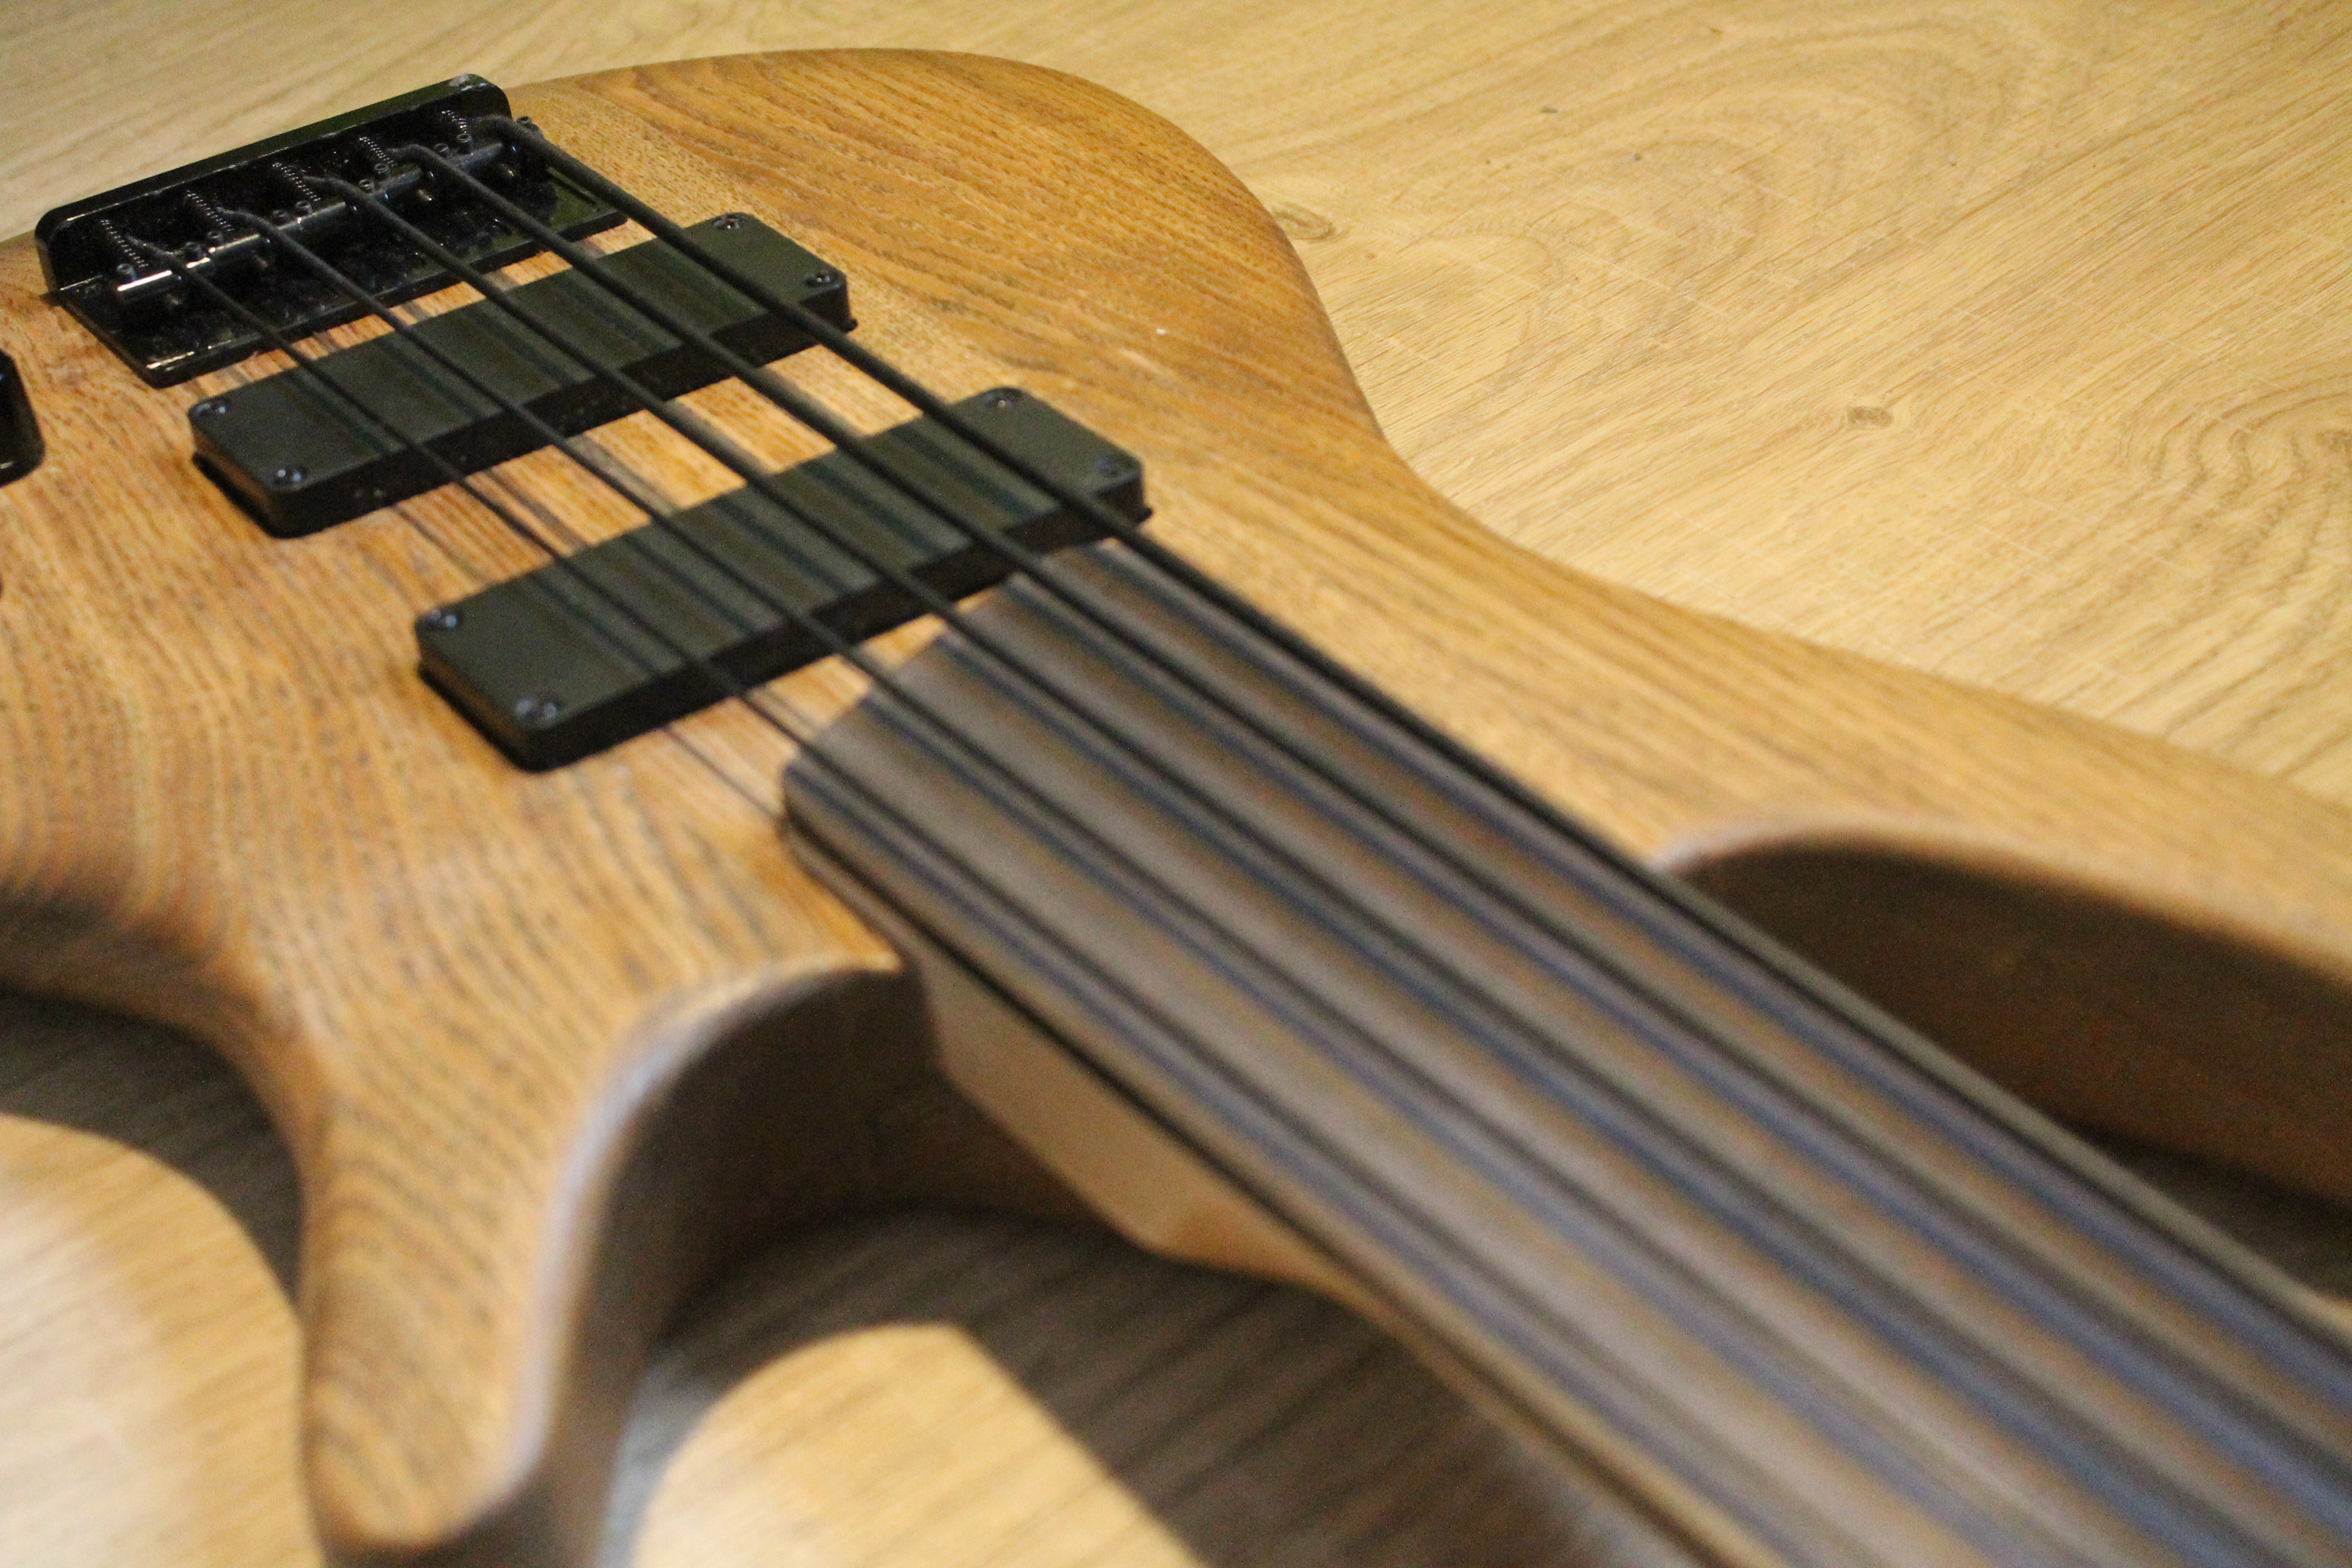
The neck had some “blackwood” fretboard which according to the internet is probably made from thermally treated maple. It has no fret marks but it has some side marks before 3d, 5th, 7th, 9th, 12th…. frets position. However, they were badly placed and I painted some fret-marks on the side of the fretboard. A neck pocket was quite loose and required some work to make it tight.
There were no predrilled holes for the bridge (only ground connection hole), tuners screws, as well have no holes on the back of the neck. Because of this, I am a big fan of this kit. Usually, predrilled holes on this price category kits are not well placed and this adds a lot of work to fill old holes and make new ones. Also after such a modification, it is almost impossible to avoid having some traces of the repair if you want to go for a natural wood finish.
Controls cavity was not routed to match its cover plate. To correct this without a router you will have to spend quite a lot of time with a chisel.
Assembling
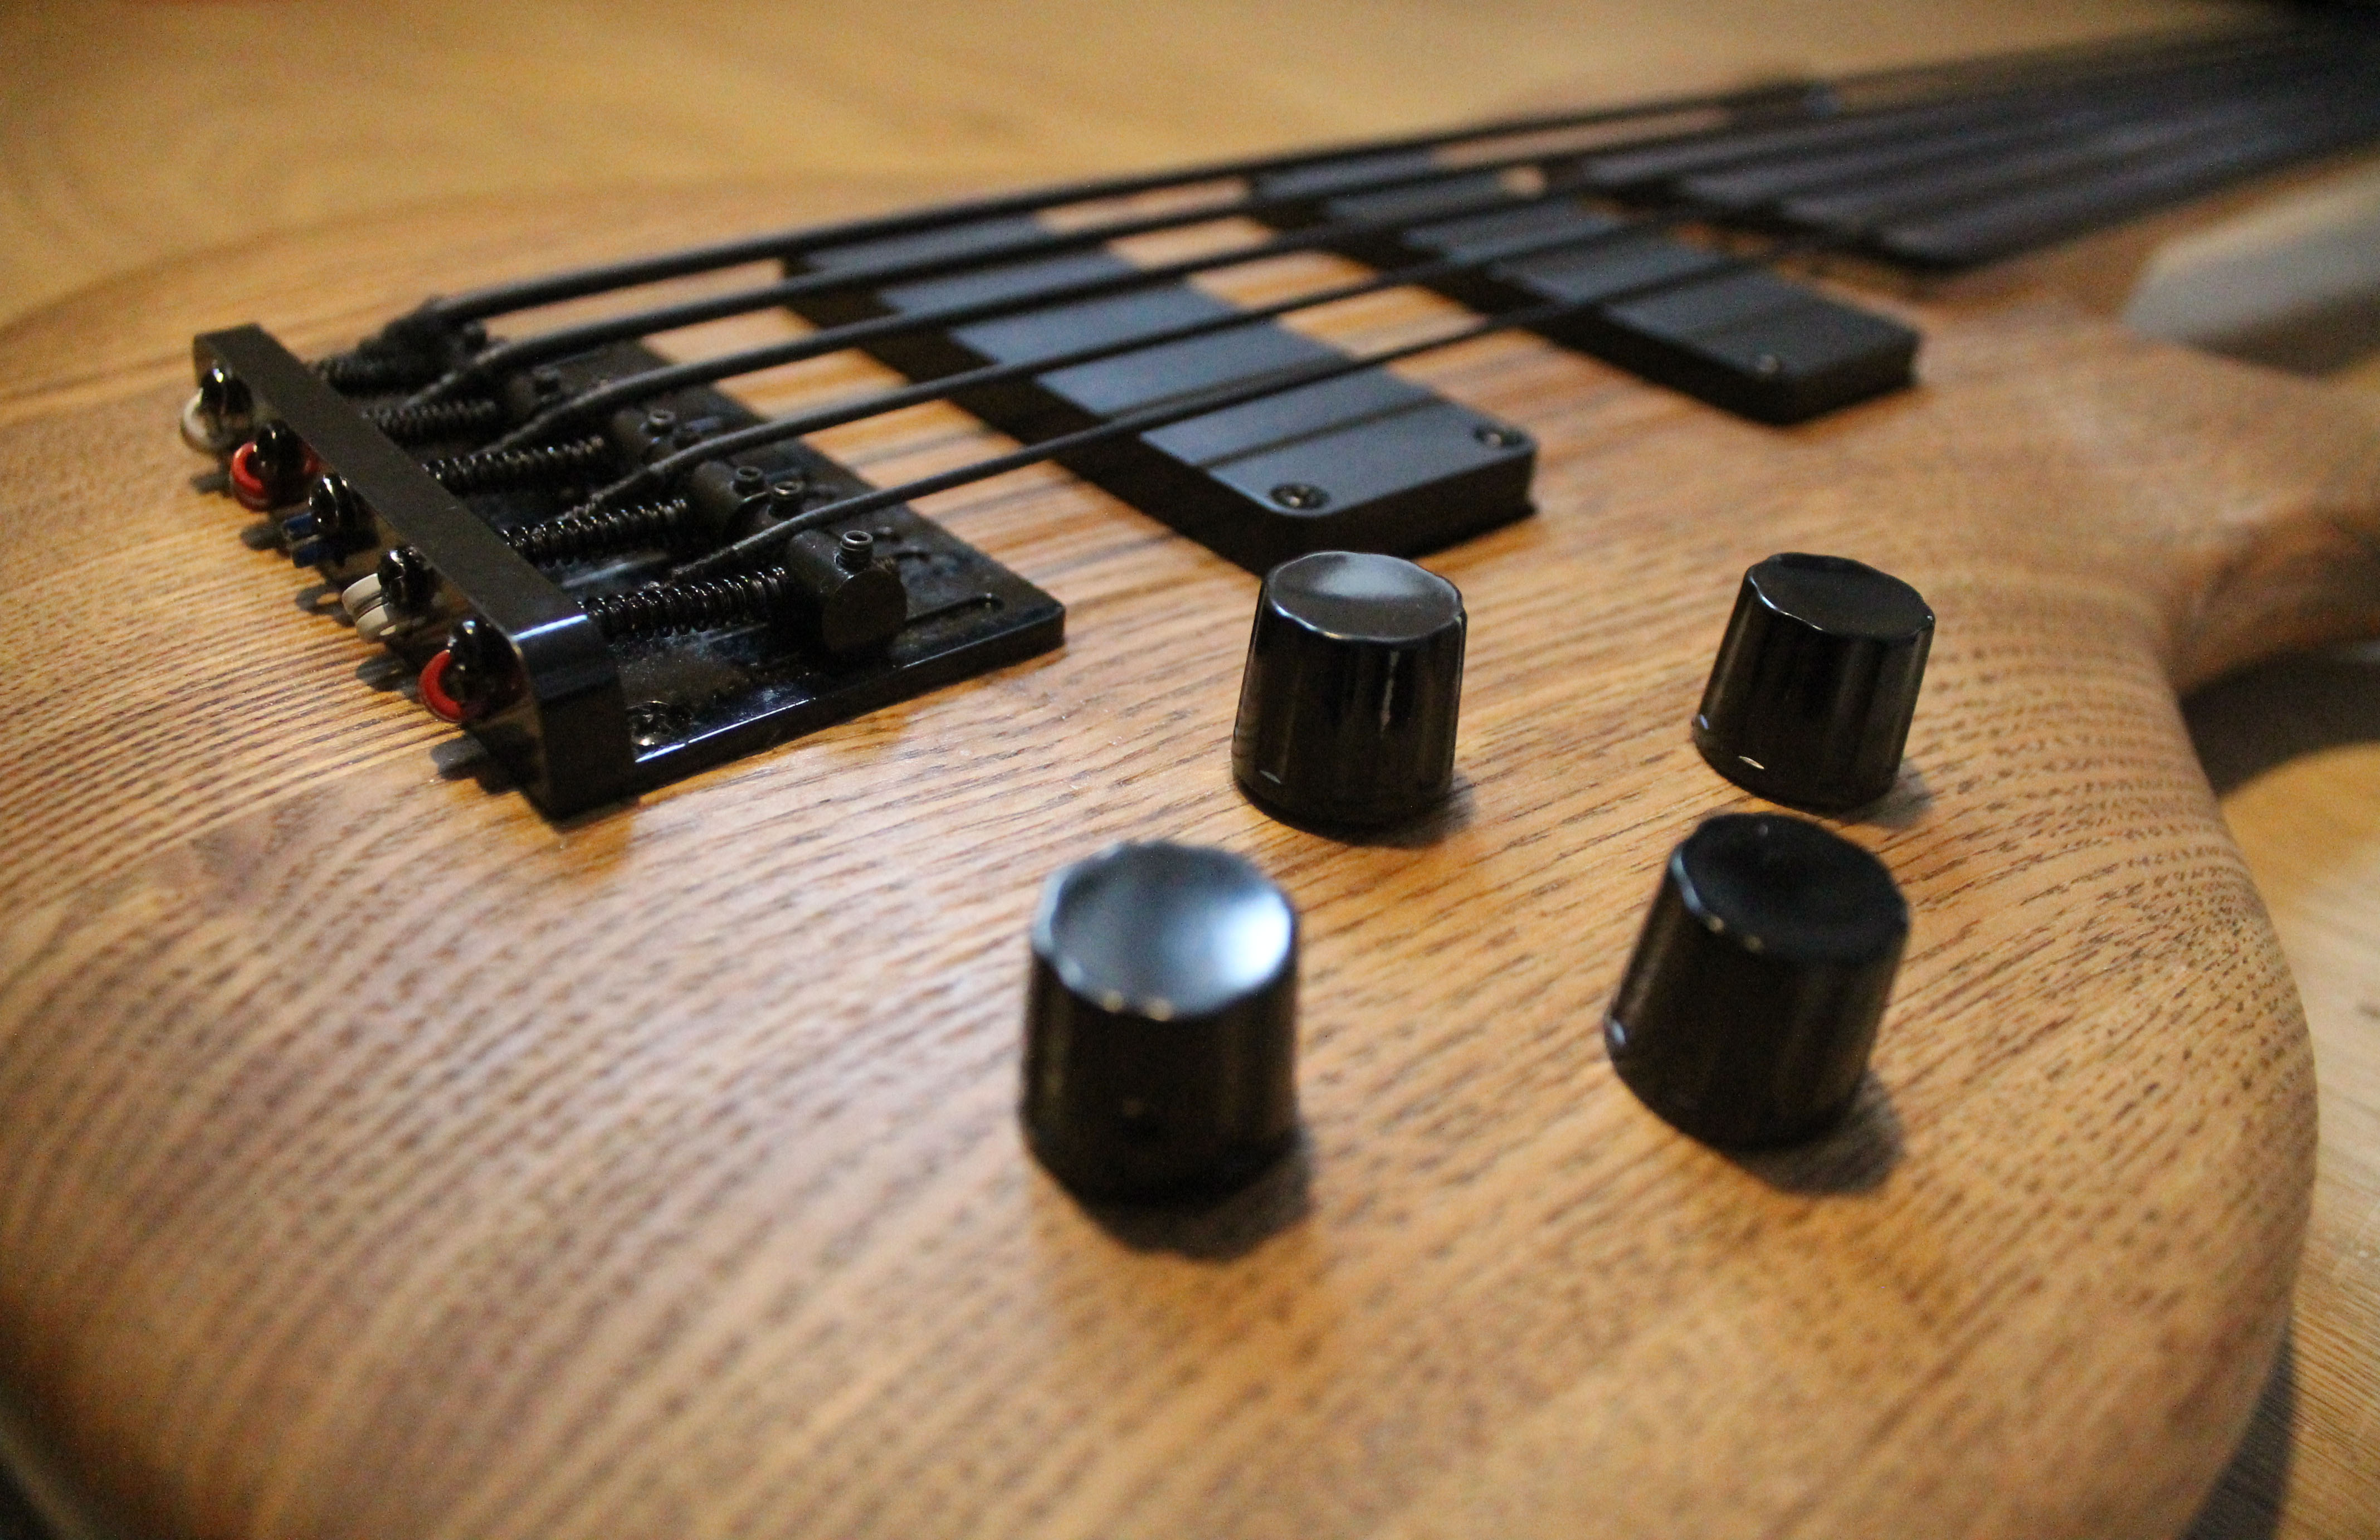
As there were no holes for the bridge, the installation first requires some measuring. I have placed the bridge in the needed distance from nut according to neck side inlays markers. 12’s fret distance should be around half distance between 11 and 12th fret higher than 12th fret side mark.
As much I am appreciating the absence of predrilled holes there could be also a bad side. I placed the bridge symmetrically in front of the bridge pickup. Using highest and lowest strings I found good neck angle to have strings to be symmetrical in relation to the fretboard. My mistake was to not check strings position against pickup holes. I didn’t notice that because of the bridge design strings are not centered on saddles. 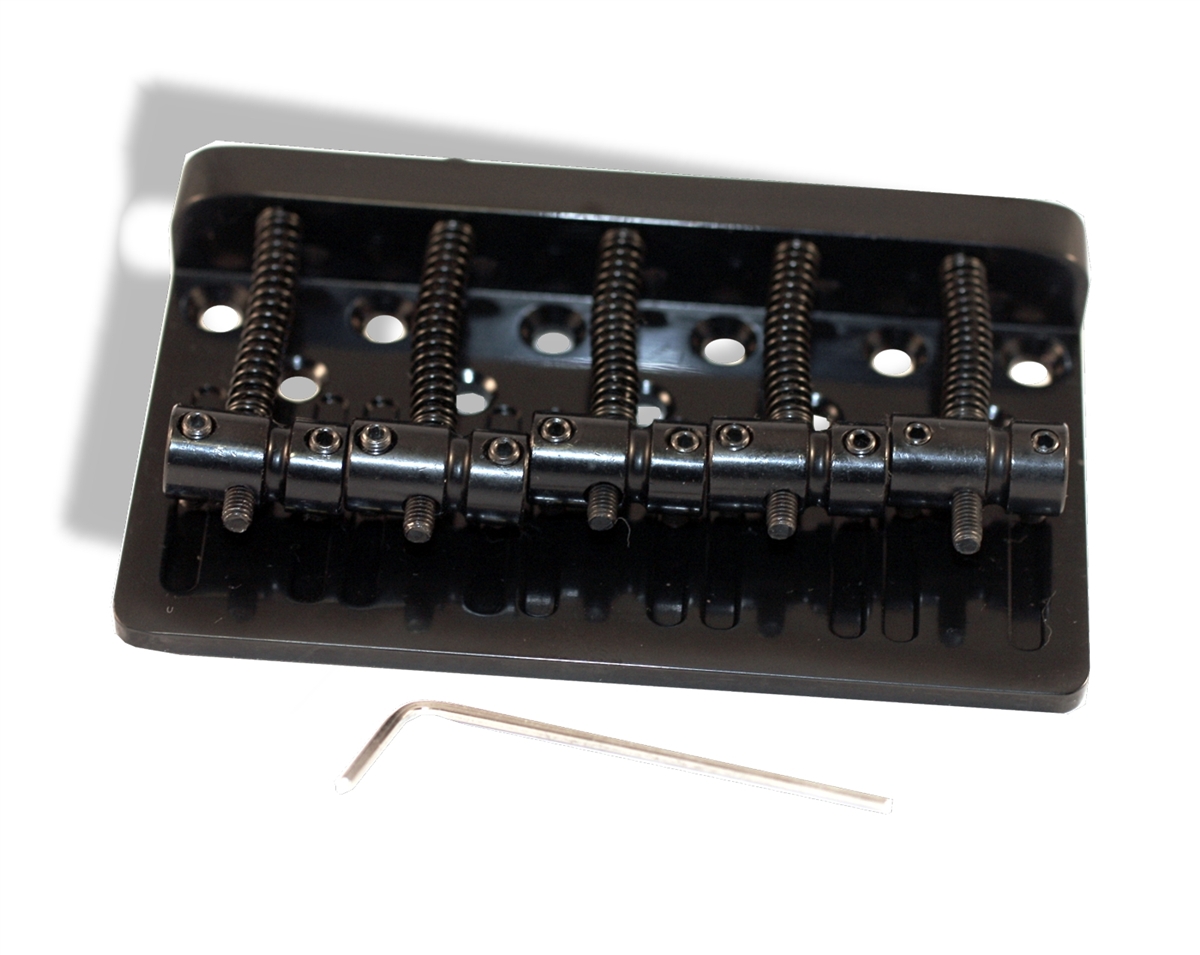
Unfortunately, to correct this mistake I had to move the bridge a bit down, correct one more time the neck pocket, and the saddest thing, to fill and redrill holes for the neck-body joint. I did it with dowels and superglue. Seems to work fine. If you want to build this kit be careful with the bridge position.
Tuners are acceptable quality. After reassembling with sandpaper and some oil they become very smooth and stable.
Finish
For the finish, I used “Penetrating Guitar Finishing Oil” from Crimson Guitars. You can find Crimson guy video on how to apply the oil. I put 6 layers for the body and 4 for the neck. I am thinking that it is better to reinforce the fretboard and make it more smooth so I added many layers of oil. As the first layer, I filled fretboard wood grains using a special oil-sanding technique. Here as a first layer I and applying more oil and working with thin sandpaper(wet) to get some wooden dust. The oil-dusty substance then works like grain filler. After many layers of oil, I had a flat shiny surface. But it turned out that such a fretboard finish is not usable. The surface became sticky and after some playing oil layer started to separate from the fingerboard. Especially under the strings. So after some time, I decided to send down the shiny layer of oil. Fretboard becomes very nice, fast, and still very solid.
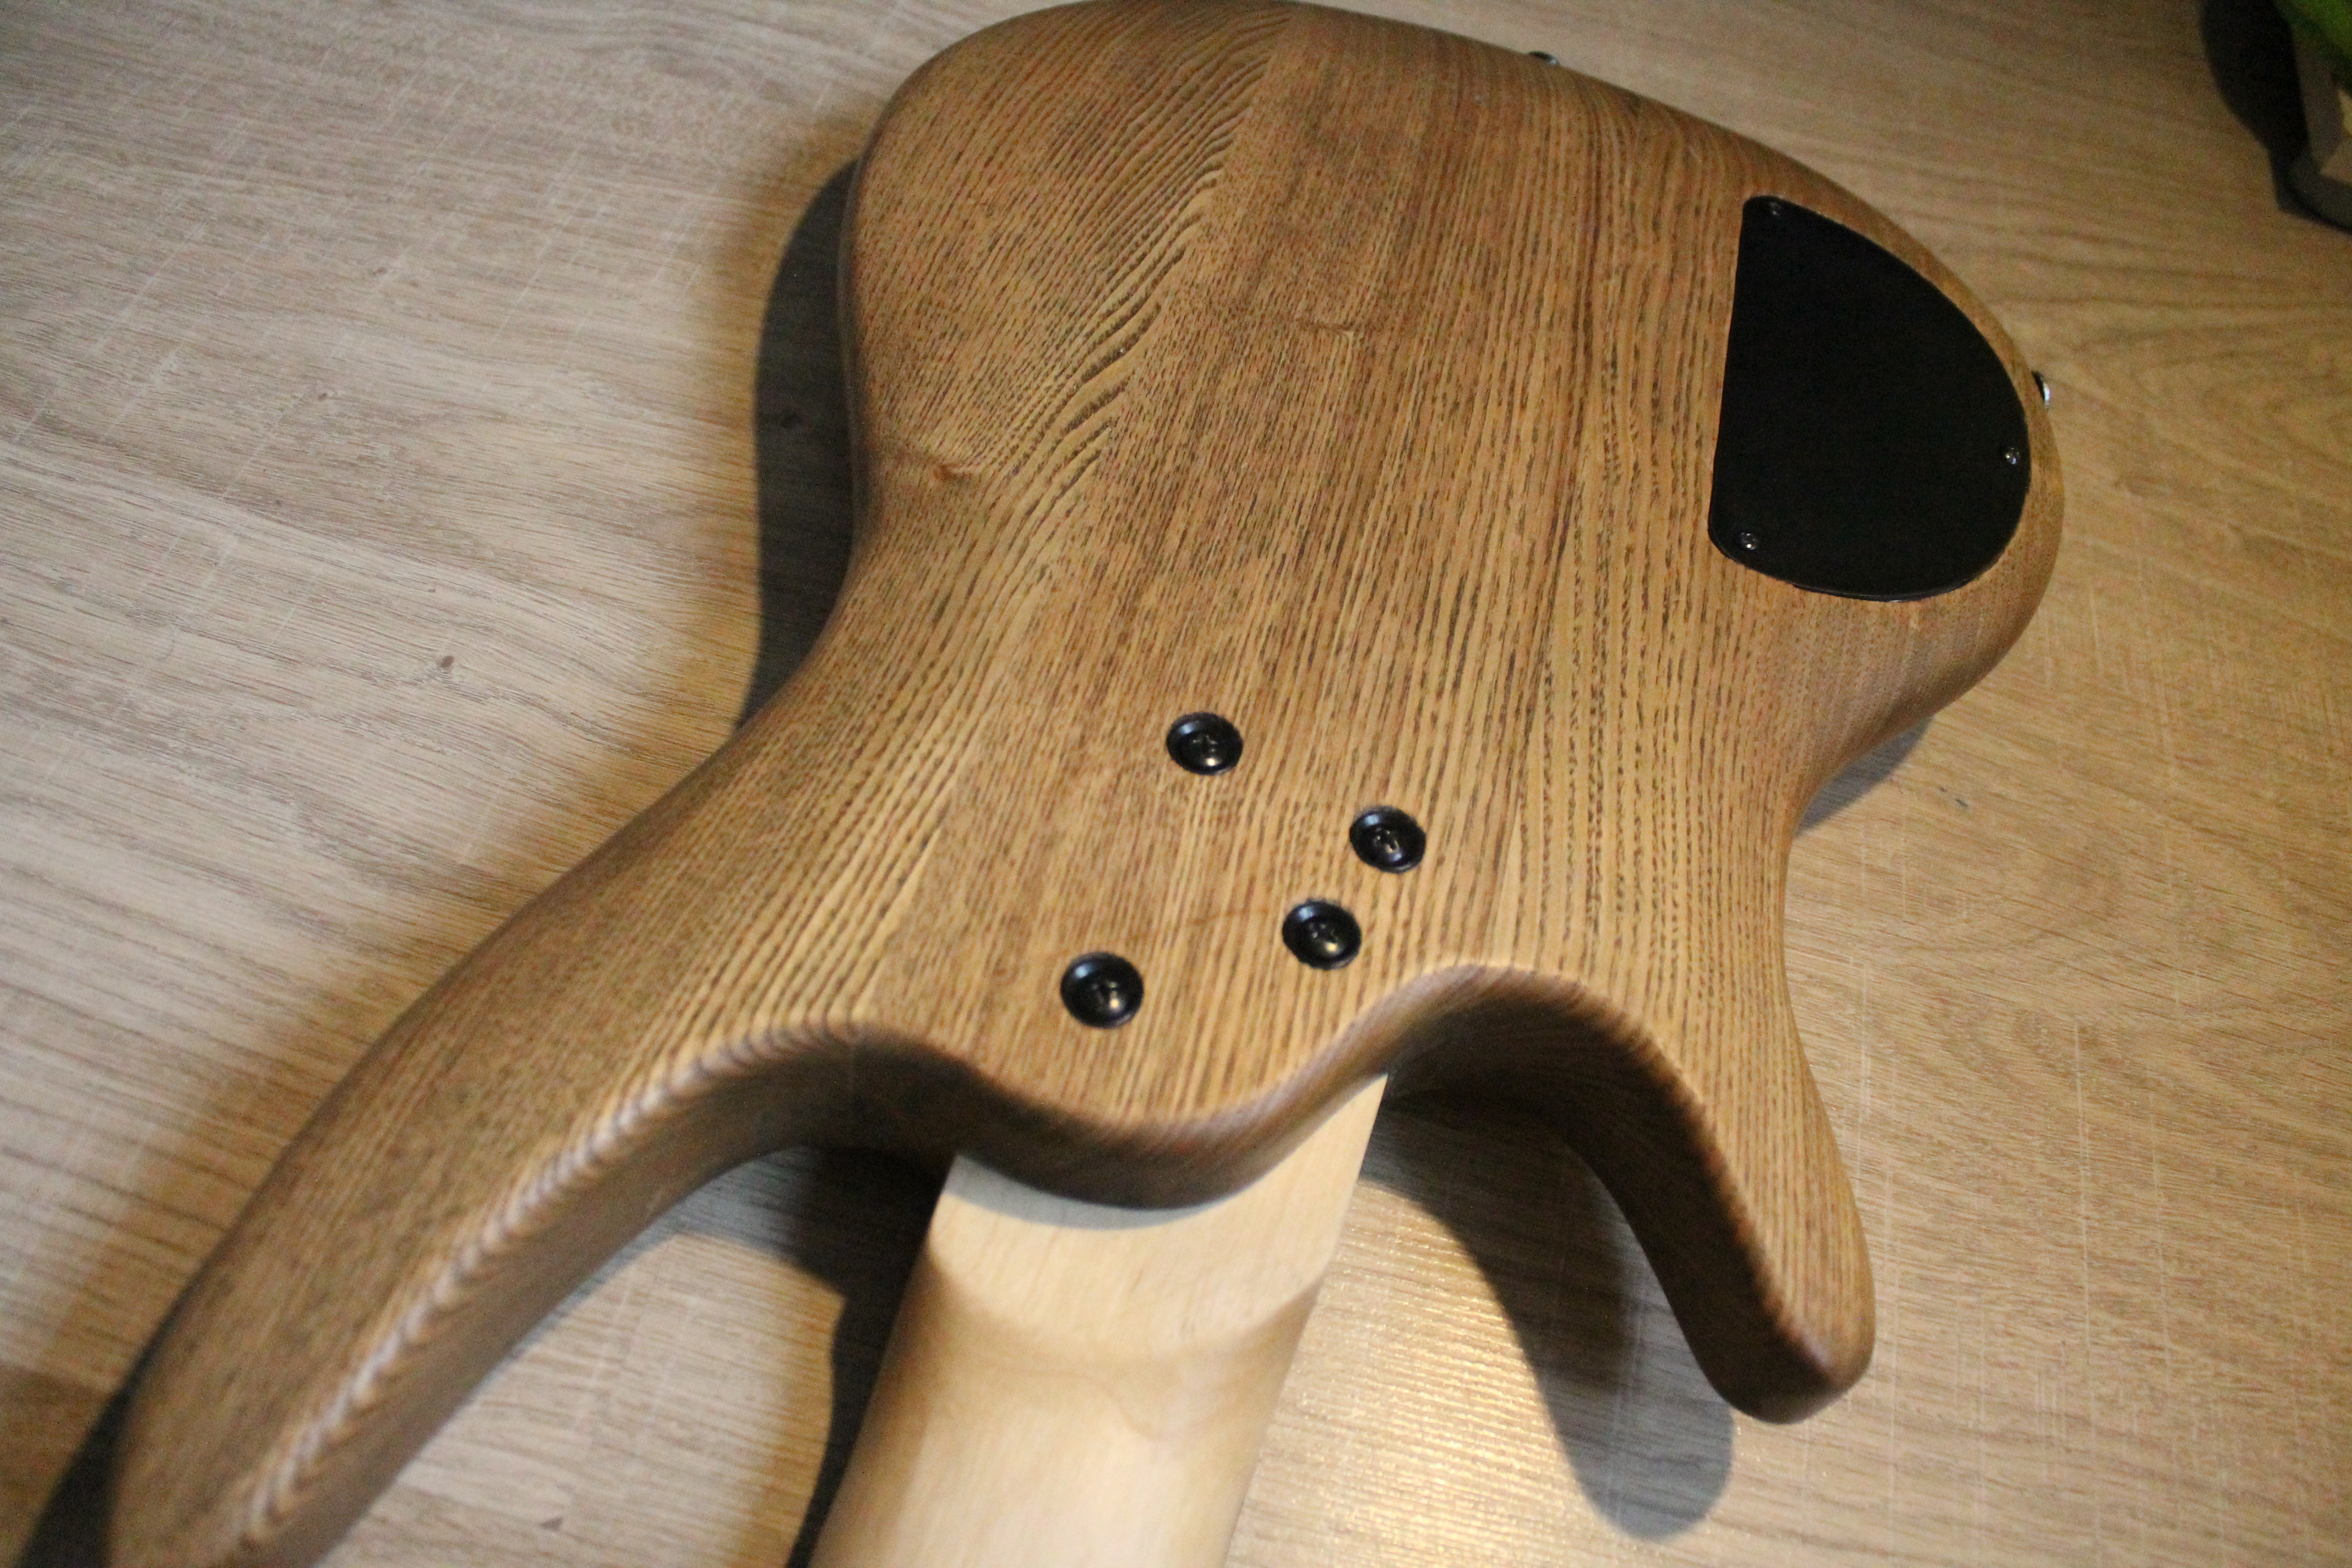
Before applying the oil I painted body with black watercolor paint. Then I sanded it down in order to keep black color inside grains. Here is a picture of the body and neck after a few layers.

Electronics
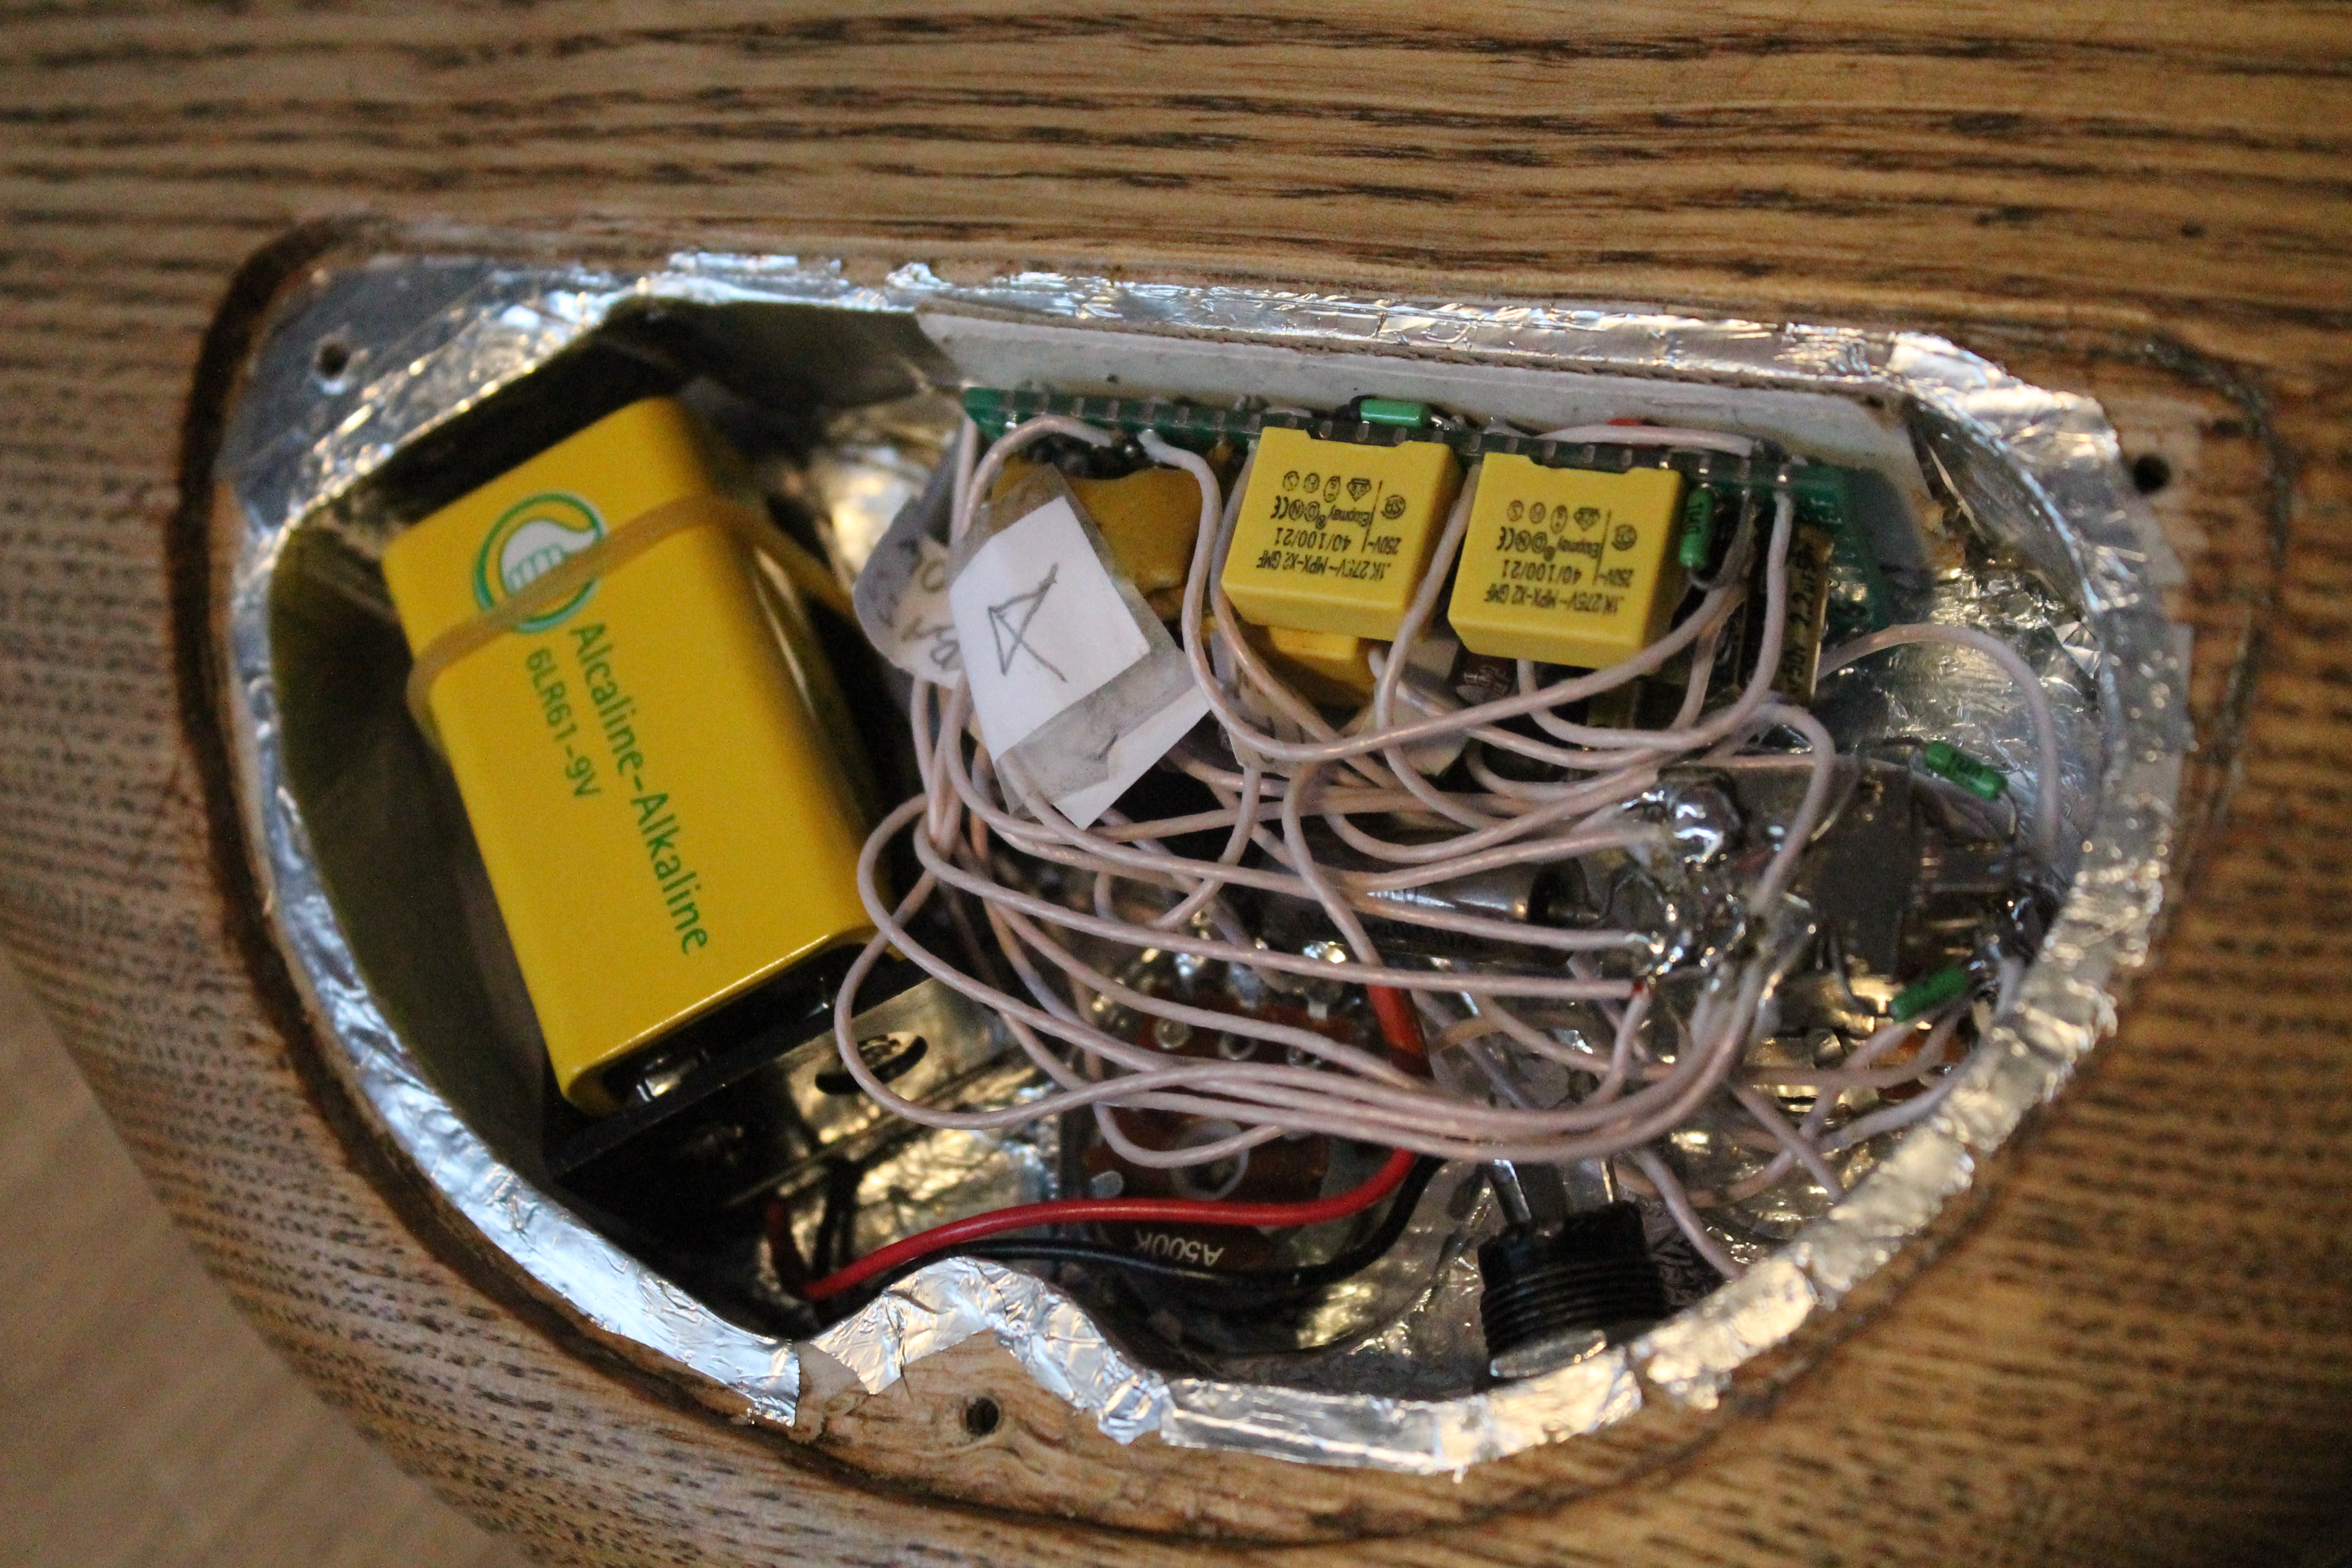
An advantage of DIY kit instruments is customization. Customization is also applicable to electronics. However, replacements for 5 strings soap bar pickups are quite hard to find unless you spend hundreds or euro. Default pickups are not extremely bad but still a bit muddier then good humbucker and what is strange they are still picking up some high-frequency noise. Measurements of DC resistance showed 10k and 5k for separate coils of humbuckers. In order to minimize noise, I screened electronic and pickup cavities with an aluminum foil. Unfortunately, the input jack has to be replaced as it has a very loose ground connection
For the bass, I made a simple preamp with 2 band eq. You can find the bass preamp schematic and description on this page. With the preamp, 4 controls became: volume, pickups blend, treble(active/passive), bass(active)-push-pull switch.
My friend wanted to get some double bass tones from the bass and we ordered Rotosound 88 strings. These strings are BLACK NYLON taped. For my taste with stock humbuckers and this strings sound it too dull and characterless. So I plan to swap pickups
Photos


Video
Here is a video demo of this SR fretless DIY bass. Sorry for my playing. Didn’t have much time to practice a fretless bass.